本文在提供完整代码示例,可见 https://github.com/YunaiV/SpringBoot-Labs 的 lab-68-spring-security-oauth 目录。
原创不易,给点个 Star 嘿,一起冲鸭!
1. 概述
在《芋道 Spring Security OAuth2 入门》文章中,我们完成了 Spring Security OAuth 框架的学习。但是我们在文末中也提到,采用基于内存的 InMemoryTokenStore,实现访问令牌和刷新令牌的存储。它会存在两个明显的缺点:
- 重启授权服务器时,令牌信息会丢失,导致用户需要重新授权。
- 多个授权服务器时,令牌信息无法共享,导致用户一会授权成功,一会授权失败。
因此,本文我们来学习 Spring Security OAuth 提供的其它存储器。TokenStore 是 Spring Security OAuth 定义的令牌存储器接口,它有如下实现类:
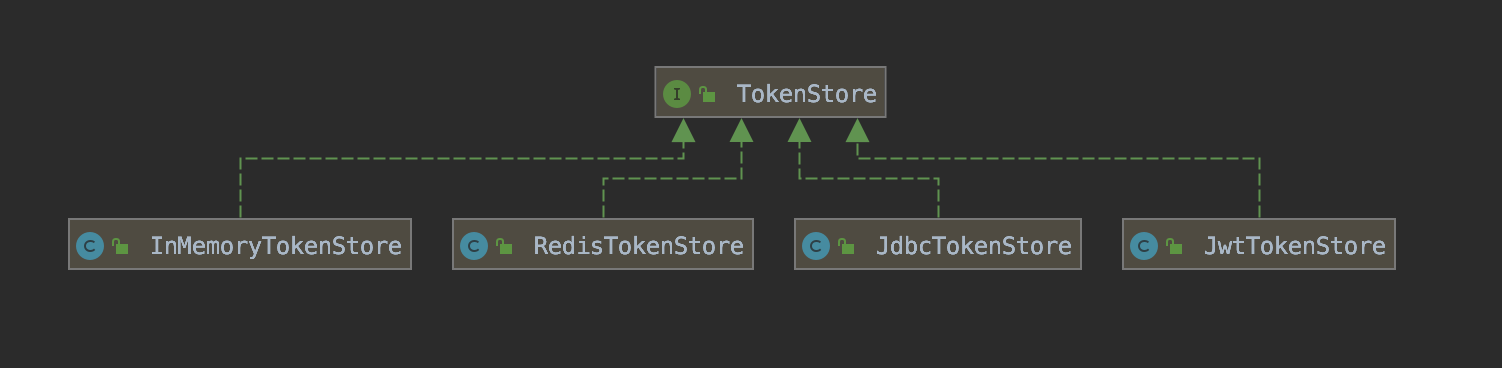
下面,我们逐个小节来演示每个 TokenStore 的配置与使用。
2. 数据库存储器
示例代码对应仓库:
本小节,我们使用基于数据库存储的 JdbcTokenStore。
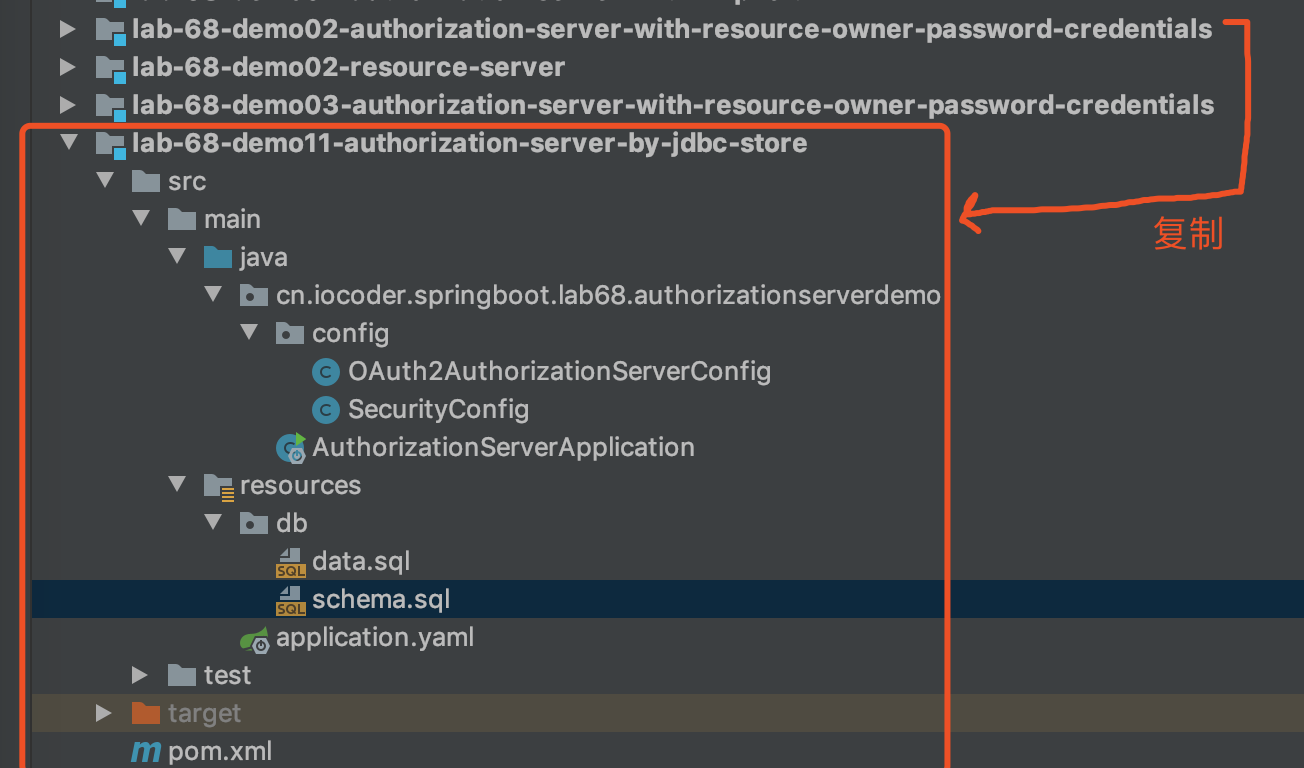
复制出 lab-68-demo11-authorization-server-by-jdbc-store 项目,进行改造接入 JdbcTokenStore 存储器。最终项目如下图所示:
2.1 初始化数据库
① 执行 schema.sql 脚本,创建数据库表结构。
drop table if exists oauth_client_details;
create table oauth_client_details (
  client_id VARCHAR(255) PRIMARY KEY,
  resource_ids VARCHAR(255),
  client_secret VARCHAR(255),
  scope VARCHAR(255),
  authorized_grant_types VARCHAR(255),
  web_server_redirect_uri VARCHAR(255),
  authorities VARCHAR(255),
  access_token_validity INTEGER,
  refresh_token_validity INTEGER,
  additional_information VARCHAR(4096),
  autoapprove VARCHAR(255)
);

create table if not exists oauth_client_token (
  token_id VARCHAR(255),
  token LONG VARBINARY,
  authentication_id VARCHAR(255) PRIMARY KEY,
  user_name VARCHAR(255),
  client_id VARCHAR(255)
);

create table if not exists oauth_access_token (
  token_id VARCHAR(255),
  token LONG VARBINARY,
  authentication_id VARCHAR(255) PRIMARY KEY,
  user_name VARCHAR(255),
  client_id VARCHAR(255),
  authentication LONG VARBINARY,
  refresh_token VARCHAR(255)
);

create table if not exists oauth_refresh_token (
  token_id VARCHAR(255),
  token LONG VARBINARY,
  authentication LONG VARBINARY
);

create table if not exists oauth_code (
  code VARCHAR(255), authentication LONG VARBINARY
);

create table if not exists oauth_approvals (
	userId VARCHAR(255),
	clientId VARCHAR(255),
	scope VARCHAR(255),
	status VARCHAR(10),
	expiresAt TIMESTAMP DEFAULT CURRENT_TIMESTAMP,
	lastModifiedAt TIMESTAMP DEFAULT CURRENT_TIMESTAMP
);
|
结果如下图所示:
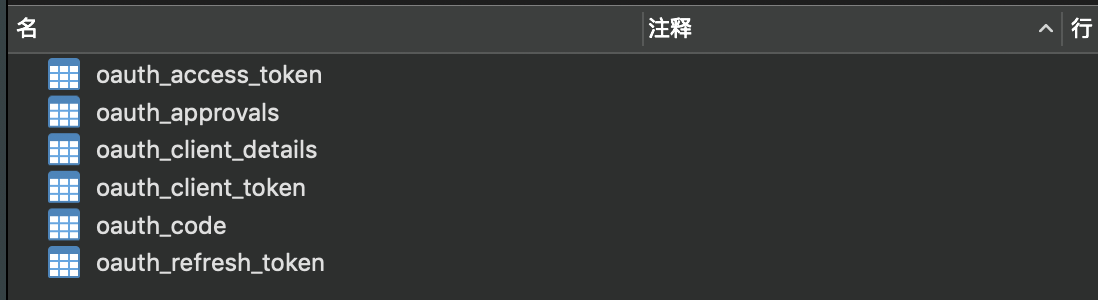
| 表 |
作用 |
|---|
oauth_access_token |
OAuth 2.0 访问令牌 |
oauth_refresh_token |
OAuth 2.0 刷新令牌 |
oauth_code |
OAuth 2.0 授权码 |
oauth_client_details |
OAuth 2.0 客户端 |
oauth_client_token |
|
oauth_approvals |
|
旁白君:这里的表结构设计,我们可以借鉴参考,实现自己的 OAuth 2.0 的功能。
② 执行 data.sql 脚本,插入一个客户端记录。
INSERT INTO oauth_client_details
	(client_id, client_secret, scope, authorized_grant_types,
	web_server_redirect_uri, authorities, access_token_validity,
	refresh_token_validity, additional_information, autoapprove)
VALUES
	('clientapp', '112233', 'read_userinfo,read_contacts',
	'password,refresh_token', null, null, 3600, 864000, null, true);
|
结果如下图所示:

2.2 引入依赖
修改 pom.xml 文件,额外引入数据库连接池的依赖:
<dependency>
<groupId>org.springframework.boot</groupId>
<artifactId>spring-boot-starter-jdbc</artifactId>
</dependency>
<dependency>
<groupId>mysql</groupId>
<artifactId>mysql-connector-java</artifactId>
<version>5.1.48</version>
</dependency>
|
2.3 配置文件
创建 application.yaml 配置文件,添加数据库连接池的配置:
spring:
datasource:
url: jdbc:mysql://127.0.0.1:43063/demo-68-authorization-server?useSSL=false&useUnicode=true&characterEncoding=UTF-8
driver-class-name: com.mysql.jdbc.Driver
username: root
password: 123456
|
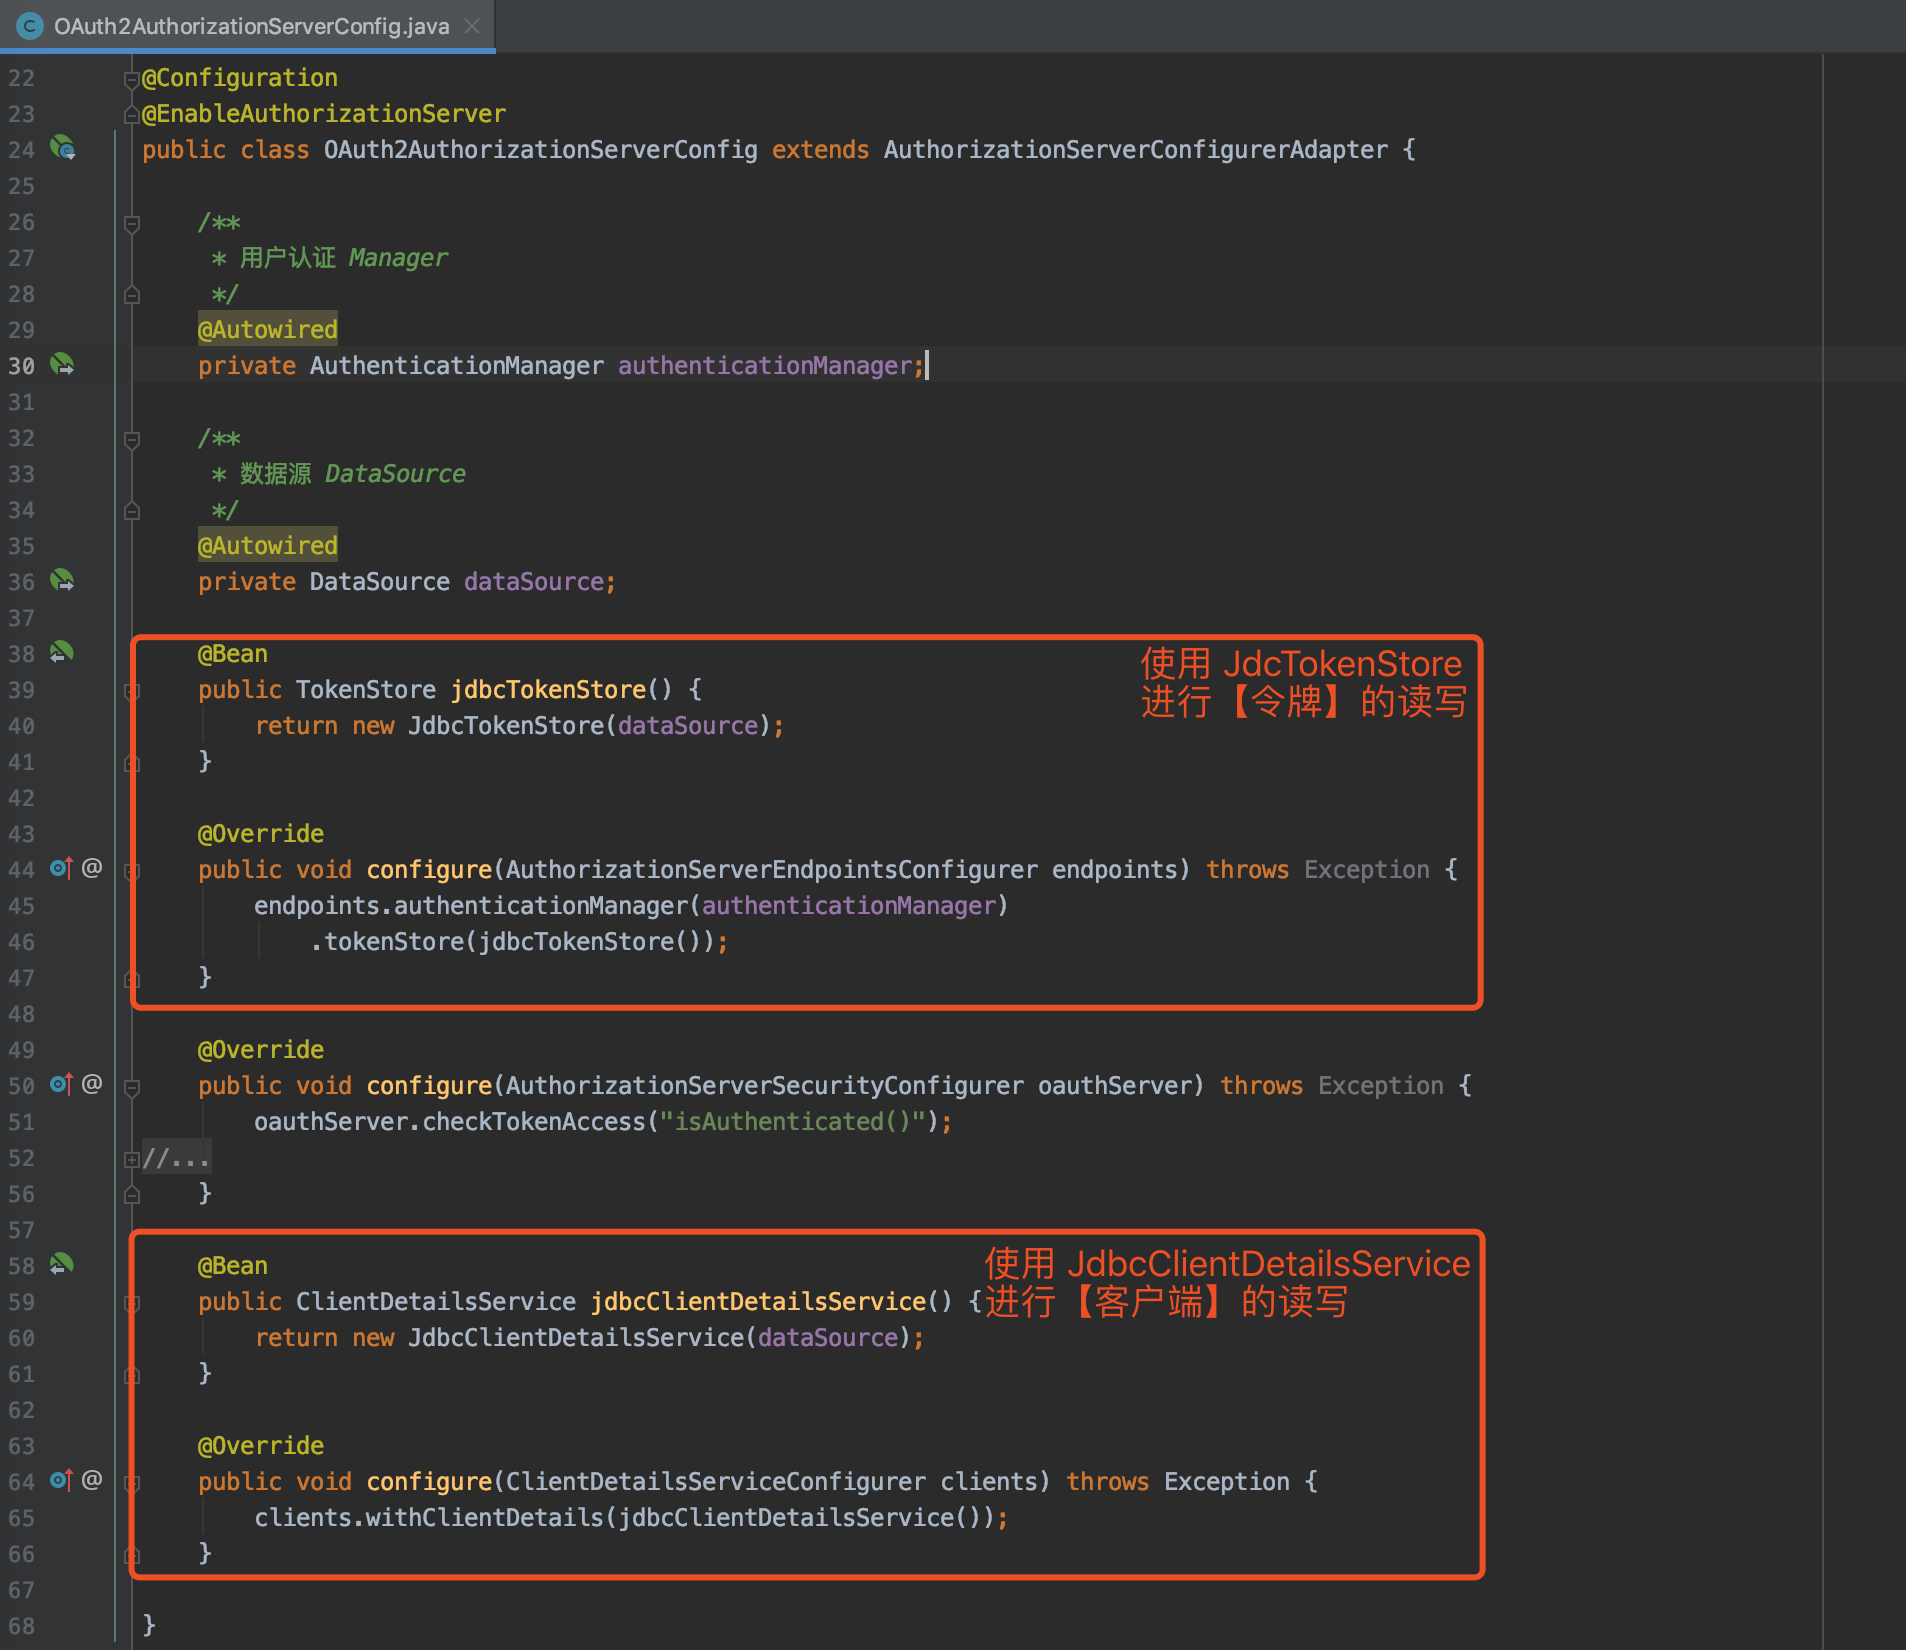
2.4 OAuth2AuthorizationServerConfig
修改 OAuth2AuthorizationServerConfig 配置类,设置使用 JdbcTokenStore 和 ClientDetailsService。代码如下:
@Configuration
@EnableAuthorizationServer
public class OAuth2AuthorizationServerConfig extends AuthorizationServerConfigurerAdapter {
@Autowired
private AuthenticationManager authenticationManager;
@Autowired
private DataSource dataSource;
@Bean
public TokenStore jdbcTokenStore() {
return new JdbcTokenStore(dataSource);
}
@Override
public void configure(AuthorizationServerEndpointsConfigurer endpoints) throws Exception {
endpoints.authenticationManager(authenticationManager)
.tokenStore(jdbcTokenStore());
}
@Override
public void configure(AuthorizationServerSecurityConfigurer oauthServer) throws Exception {
oauthServer.checkTokenAccess("isAuthenticated()");
}
@Bean
public ClientDetailsService jdbcClientDetailsService() {
return new JdbcClientDetailsService(dataSource);
}
@Override
public void configure(ClientDetailsServiceConfigurer clients) throws Exception {
clients.withClientDetails(jdbcClientDetailsService());
}
}
|
具体的修改点,如下图所示:
2.5 简单测试
执行 AuthorizationServerApplication 启动授权服务器。下面,我们使用 Postman 模拟一个 Client。
① POST 请求 http://localhost:8080/oauth/token 地址,使用密码模式进行授权。如下图所示:
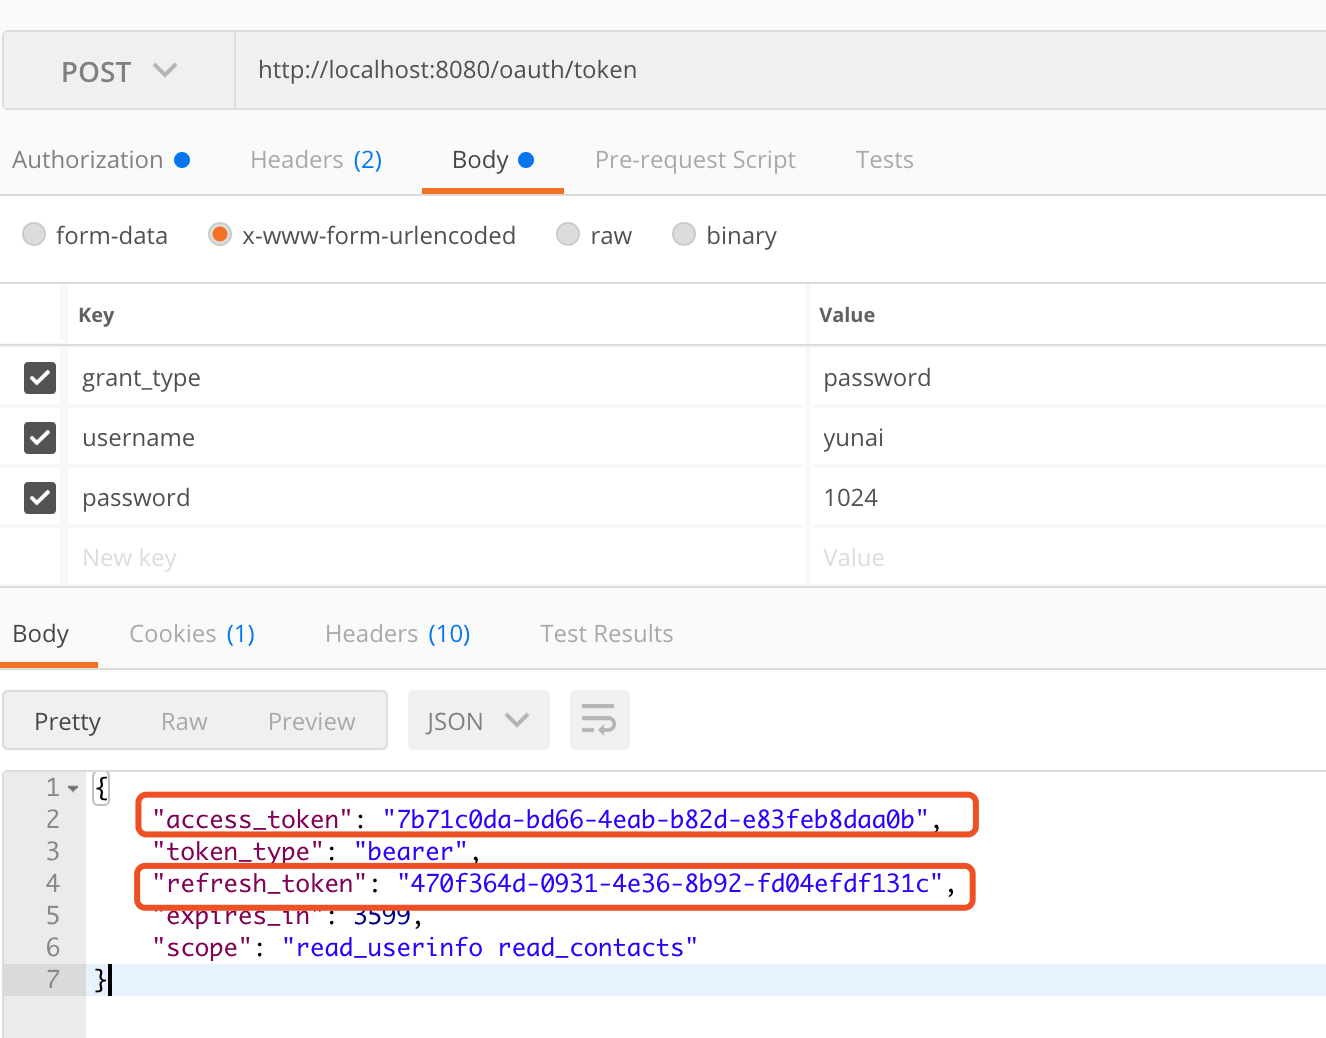
② 查询 oauth_access_token 和 oauth_refresh_token 表,查看访问令牌和刷新令牌。如下图所示:


3. Redis 存储器
示例代码对应仓库:
本小节,我们使用基于 Redis 存储的 RedisTokenStore。
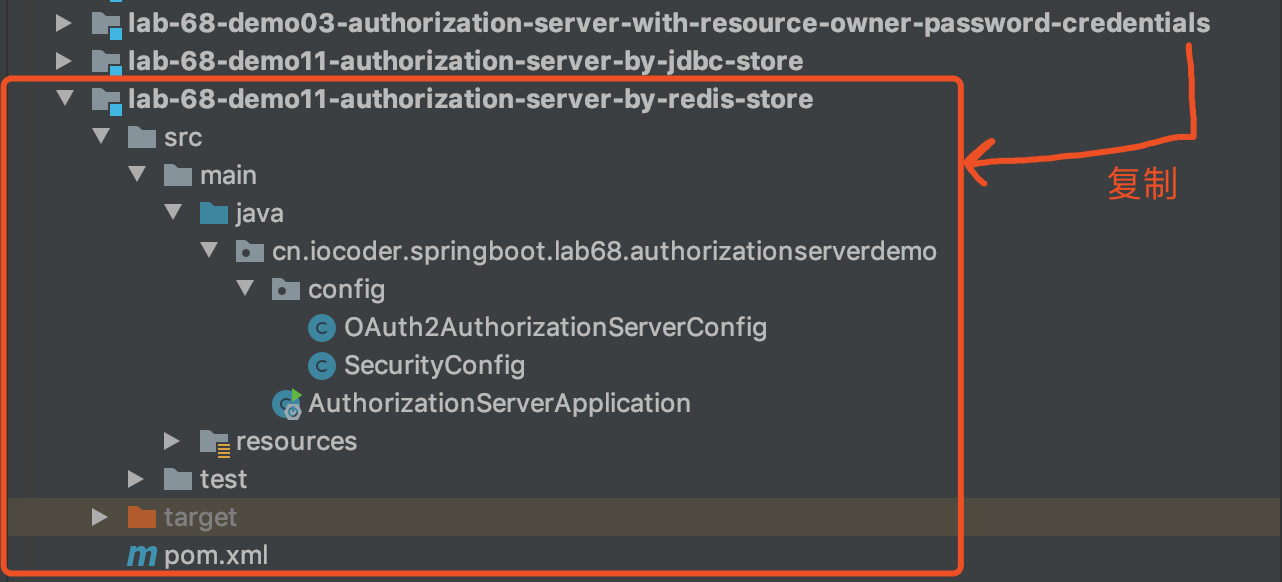
复制出 lab-68-demo11-authorization-server-by-redis-store 项目,进行改造接入 RedisTokenStore 存储器。最终项目如下图所示:
3.1 引入依赖
修改 pom.xml 文件,额外引入 Spring Data Redis 的依赖:
<dependency>
<groupId>org.springframework.boot</groupId>
<artifactId>spring-boot-starter-data-redis</artifactId>
</dependency>
|
友情提示:想要学习 Spring Data Redis 的胖友,可以看看《芋道 Spring Boot Redis 入门》文章。
3.2 配置文件
创建 application.yaml 配置文件,添加 Spring Data Redis 的配置:
spring:
redis:
host: 127.0.0.1
port: 6379
|
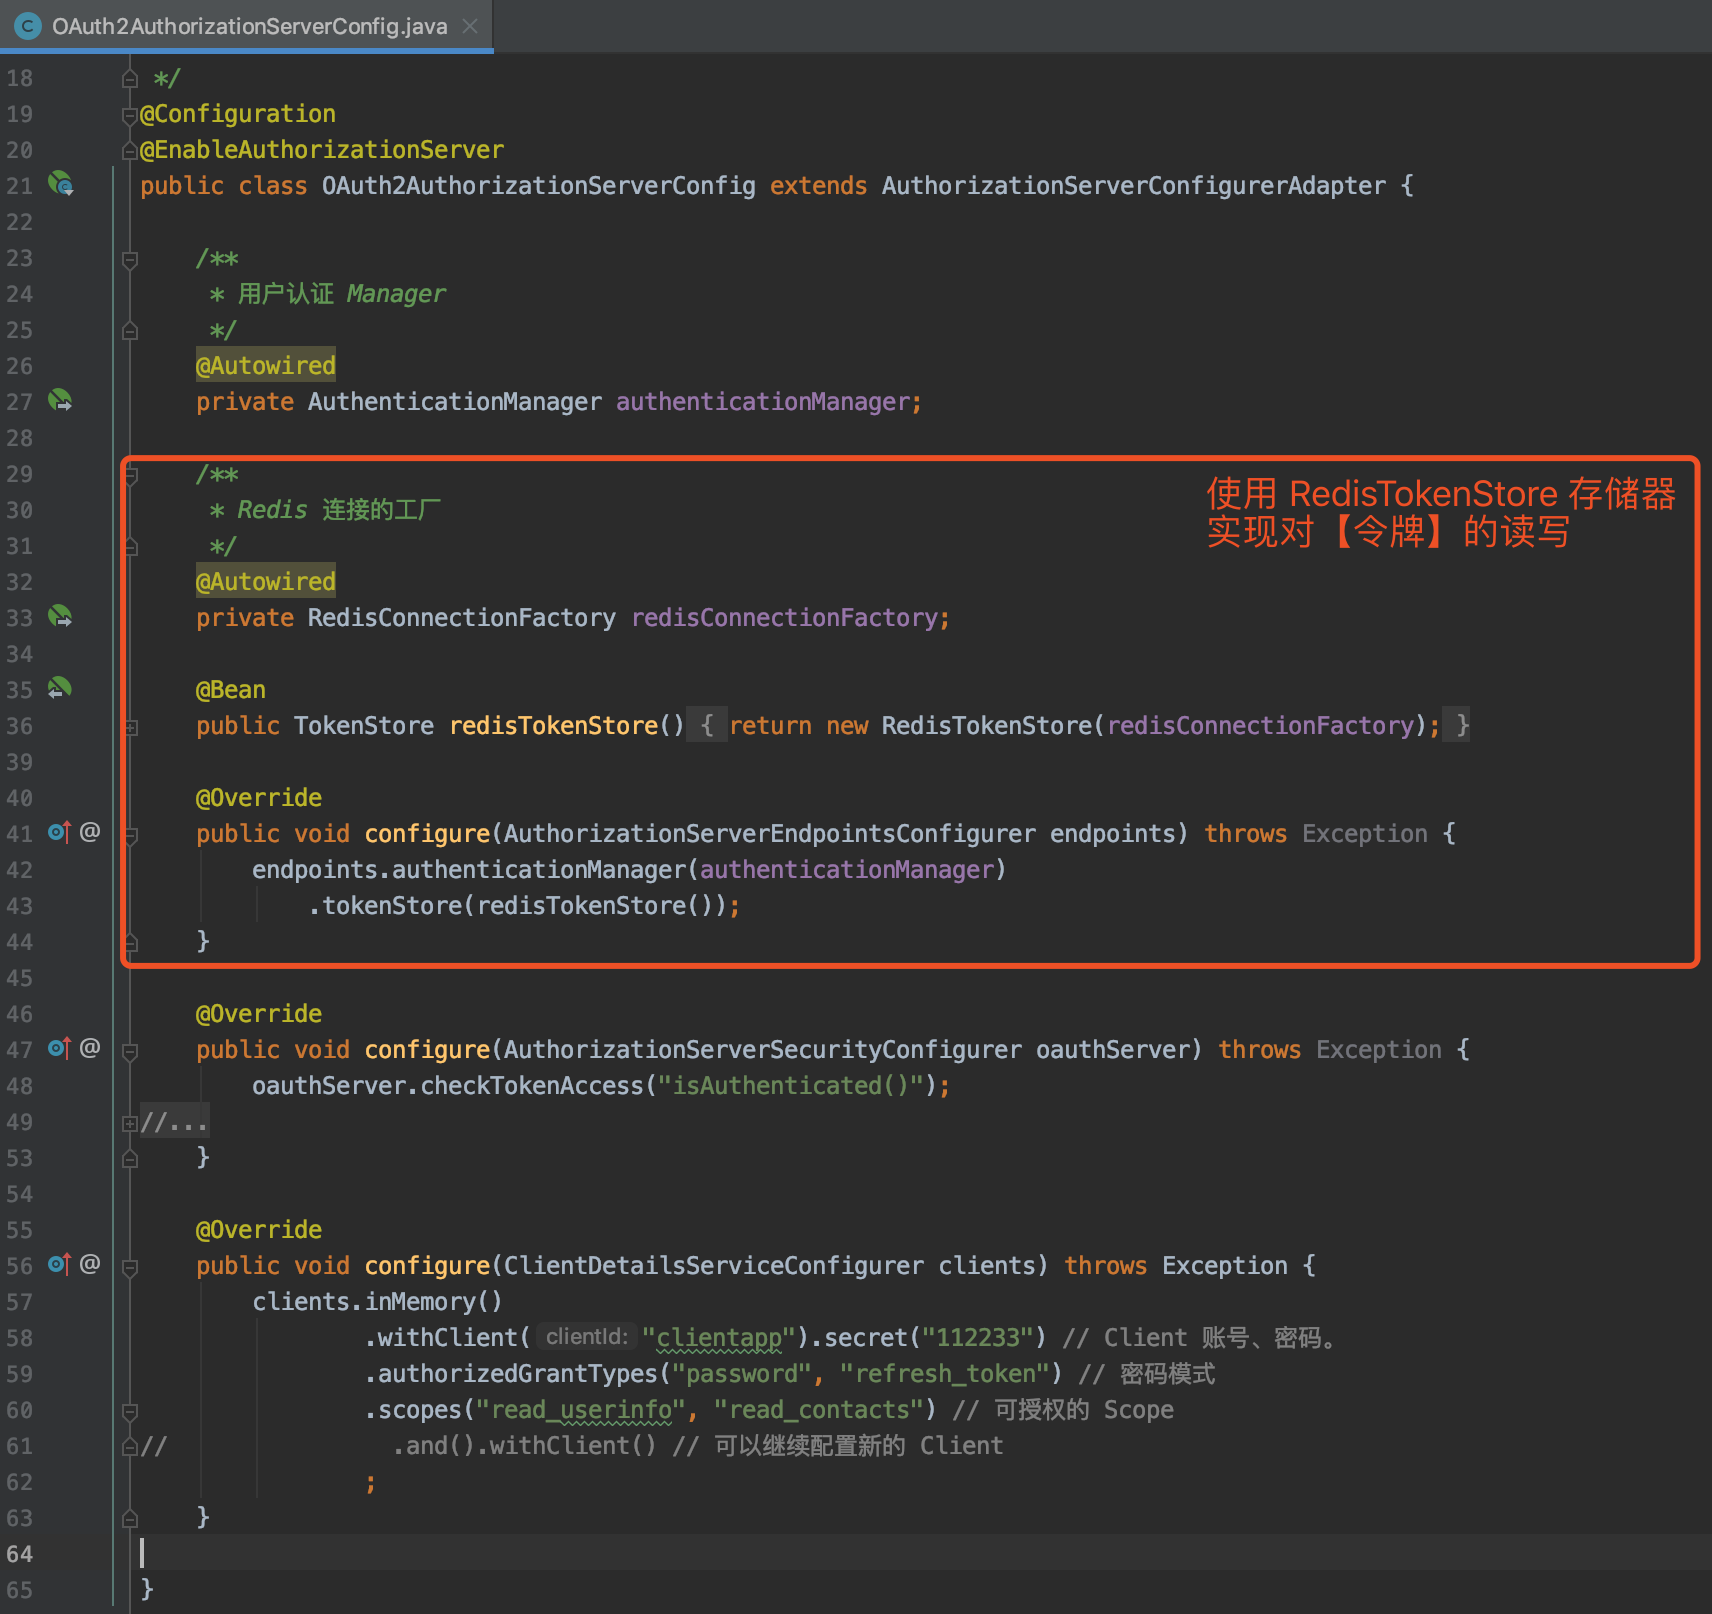
3.3 OAuth2AuthorizationServerConfig
修改 OAuth2AuthorizationServerConfig 配置类,设置使用 RedisTokenStore。代码如下:
@Configuration
@EnableAuthorizationServer
public class OAuth2AuthorizationServerConfig extends AuthorizationServerConfigurerAdapter {
@Autowired
private AuthenticationManager authenticationManager;
@Autowired
private RedisConnectionFactory redisConnectionFactory;
@Bean
public TokenStore redisTokenStore() {
return new RedisTokenStore(redisConnectionFactory);
}
@Override
public void configure(AuthorizationServerEndpointsConfigurer endpoints) throws Exception {
endpoints.authenticationManager(authenticationManager)
.tokenStore(redisTokenStore());
}
@Override
public void configure(AuthorizationServerSecurityConfigurer oauthServer) throws Exception {
oauthServer.checkTokenAccess("isAuthenticated()");
}
@Override
public void configure(ClientDetailsServiceConfigurer clients) throws Exception {
clients.inMemory()
.withClient("clientapp").secret("112233")
.authorizedGrantTypes("password", "refresh_token")
.scopes("read_userinfo", "read_contacts")
;
}
}
|
具体的修改点,如下图所示:
3.4 简单测试
执行 AuthorizationServerApplication 启动授权服务器。下面,我们使用 Postman 模拟一个 Client。
① POST 请求 http://localhost:8080/oauth/token 地址,使用密码模式进行授权。如下图所示:
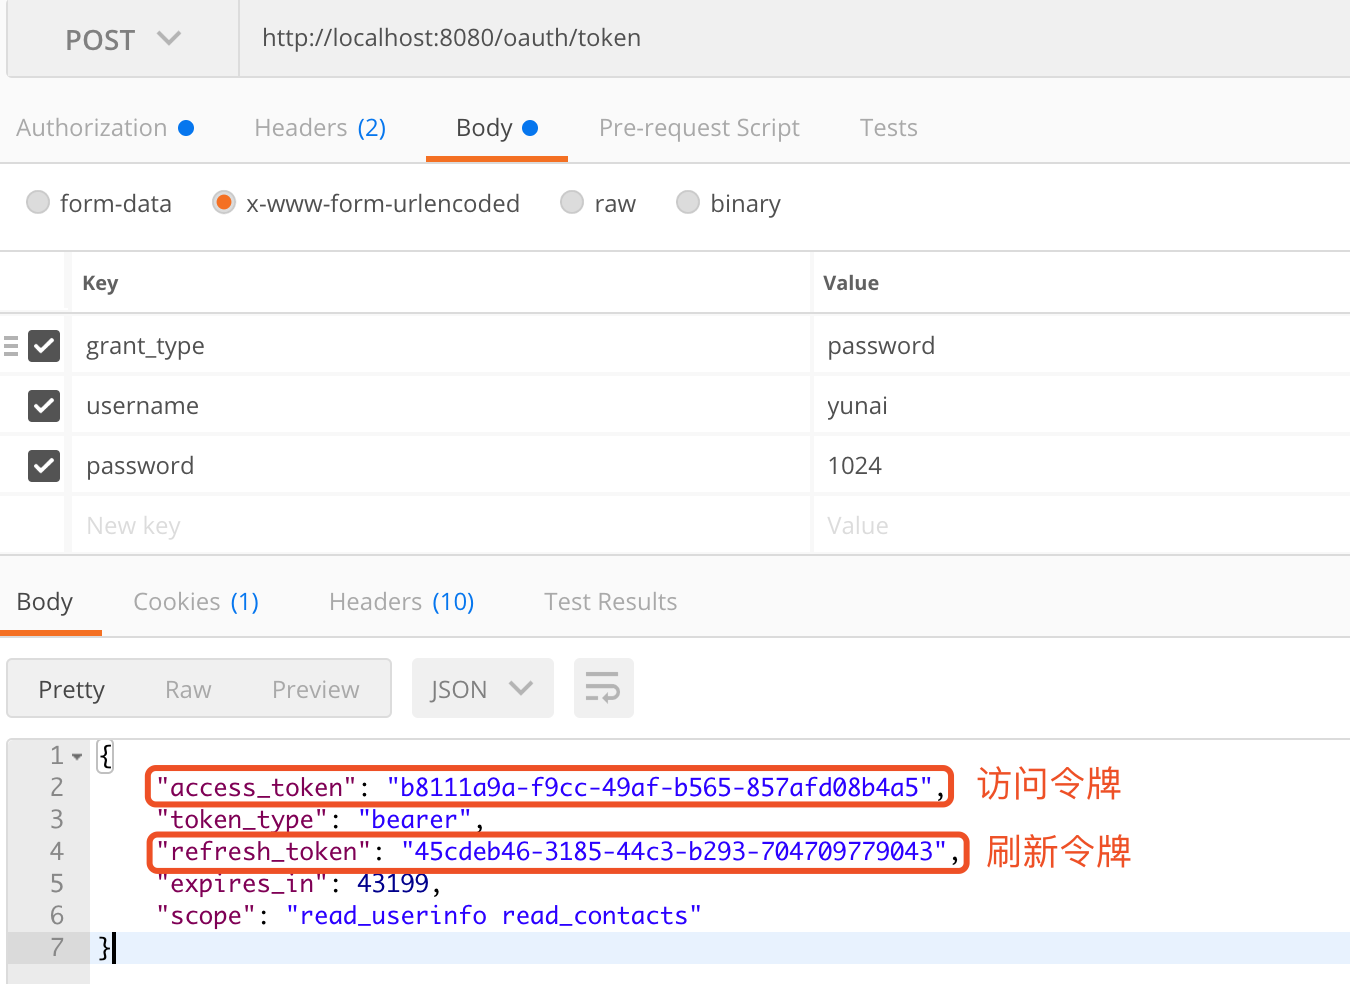
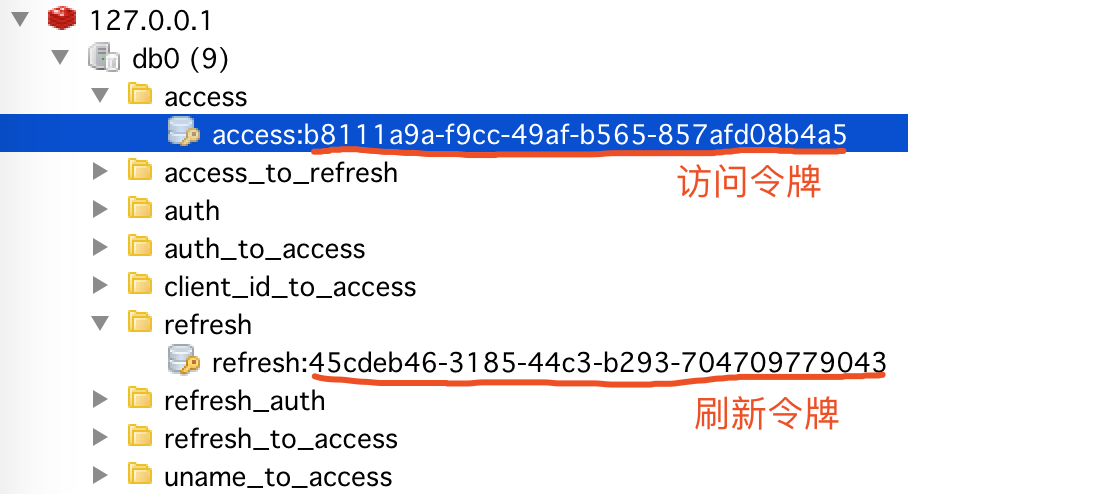
② 查看 Redis 中的 访问令牌和刷新令牌。如下图所示:
4. JWT 存储器
示例代码对应仓库:
本小节,我们使用基于 JWT 存储的 JwtTokenStore。
友情提示:如果胖友对 JWT 不了解的胖友,可以先看看如下两篇文章:
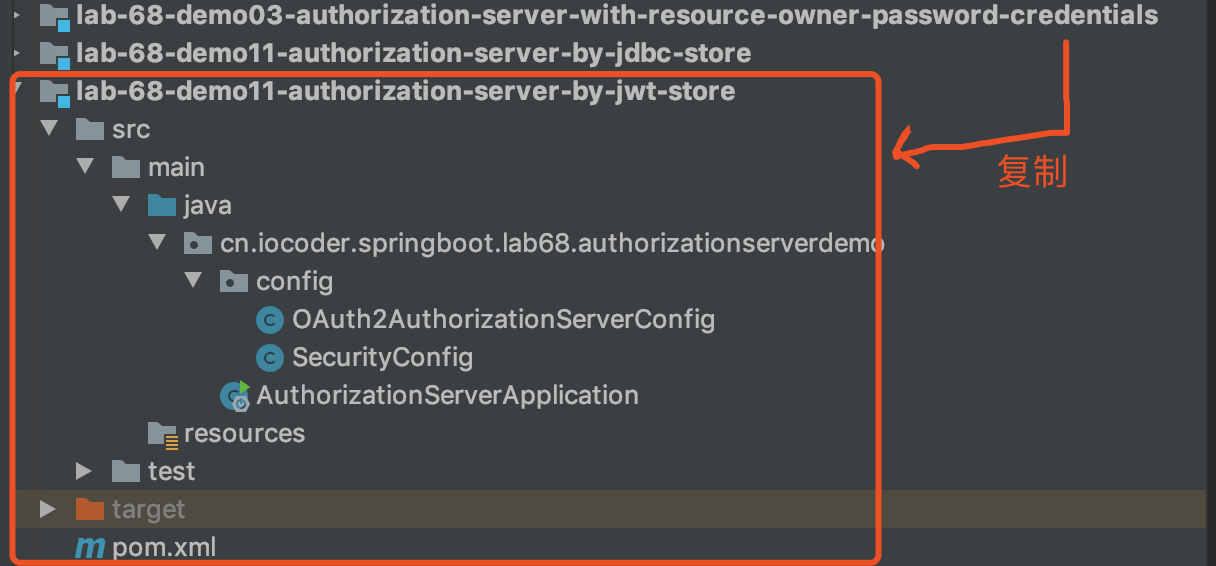
复制出 lab-68-demo11-authorization-server-by-jwt-store 项目,进行改造接入 JwtTokenStore 存储器。最终项目如下图所示:
4.1 OAuth2AuthorizationServerConfig
修改 OAuth2AuthorizationServerConfig 配置类,设置使用 JwtTokenStore。代码如下:
@Configuration
@EnableAuthorizationServer
public class OAuth2AuthorizationServerConfig extends AuthorizationServerConfigurerAdapter {
@Autowired
private AuthenticationManager authenticationManager;
@Bean
public JwtAccessTokenConverter jwtAccessTokenConverter() {
JwtAccessTokenConverter converter = new JwtAccessTokenConverter();
converter.setSigningKey("nainai_zui_shuai");
return converter;
}
@Bean
public JwtTokenStore jwtTokenStore() {
return new JwtTokenStore(jwtAccessTokenConverter());
}
@Override
public void configure(AuthorizationServerEndpointsConfigurer endpoints) throws Exception {
endpoints.authenticationManager(authenticationManager)
.tokenStore(jwtTokenStore())
.accessTokenConverter(jwtAccessTokenConverter());
}
@Override
public void configure(AuthorizationServerSecurityConfigurer oauthServer) throws Exception {
oauthServer.checkTokenAccess("isAuthenticated()");
}
@Override
public void configure(ClientDetailsServiceConfigurer clients) throws Exception {
clients.inMemory()
.withClient("clientapp").secret("112233")
.authorizedGrantTypes("password", "refresh_token")
.scopes("read_userinfo", "read_contacts")
;
}
}
|
具体的修改点,如下图所示:
4.2 简单测试
执行 AuthorizationServerApplication 启动授权服务器。下面,我们使用 Postman 模拟一个 Client。
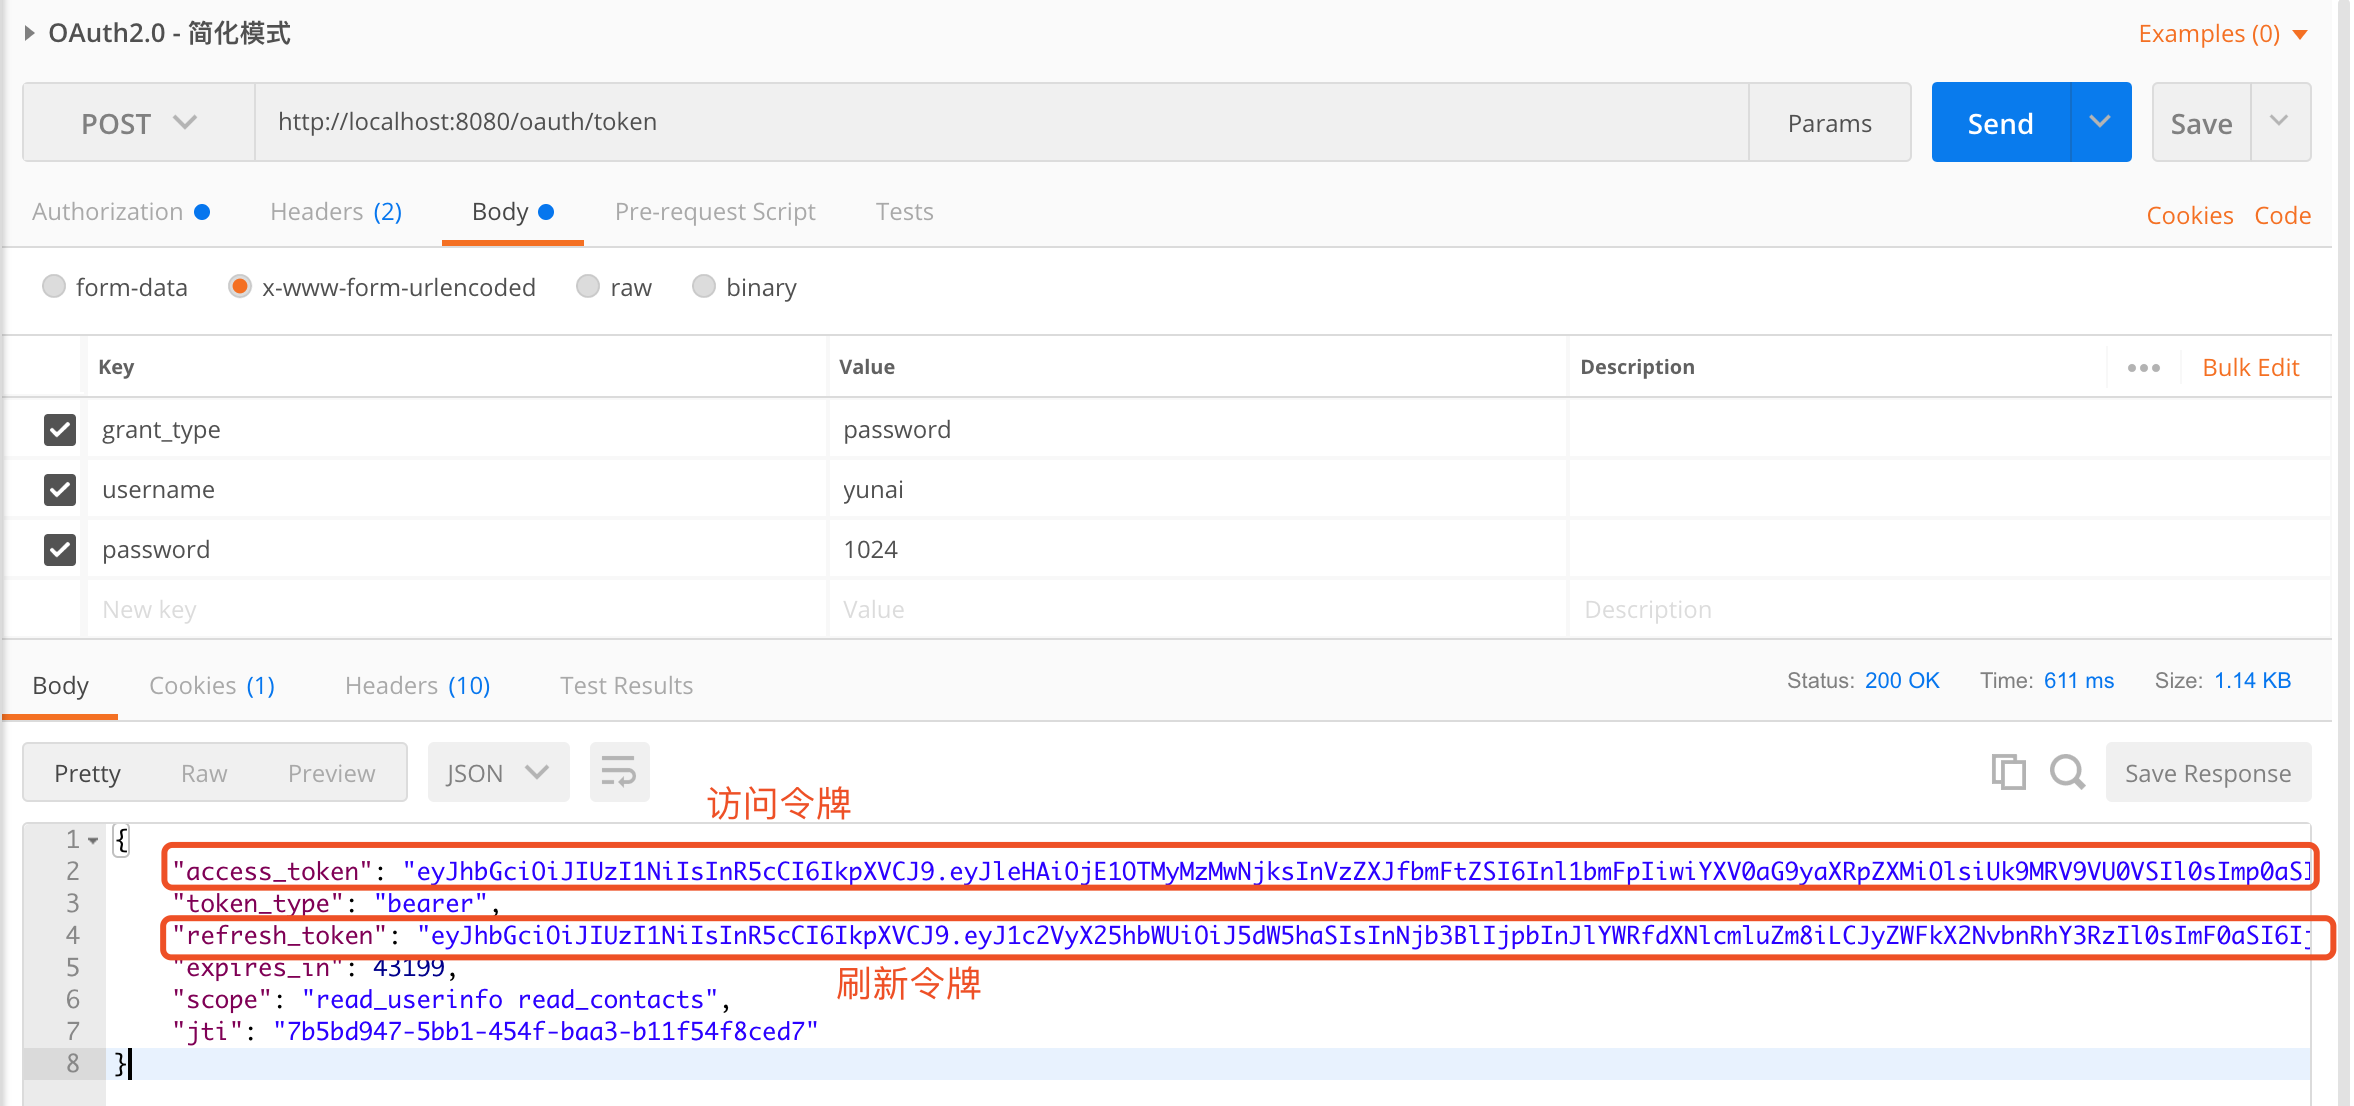
① POST 请求 http://localhost:8080/oauth/token 地址,使用密码模式进行授权。如下图所示:
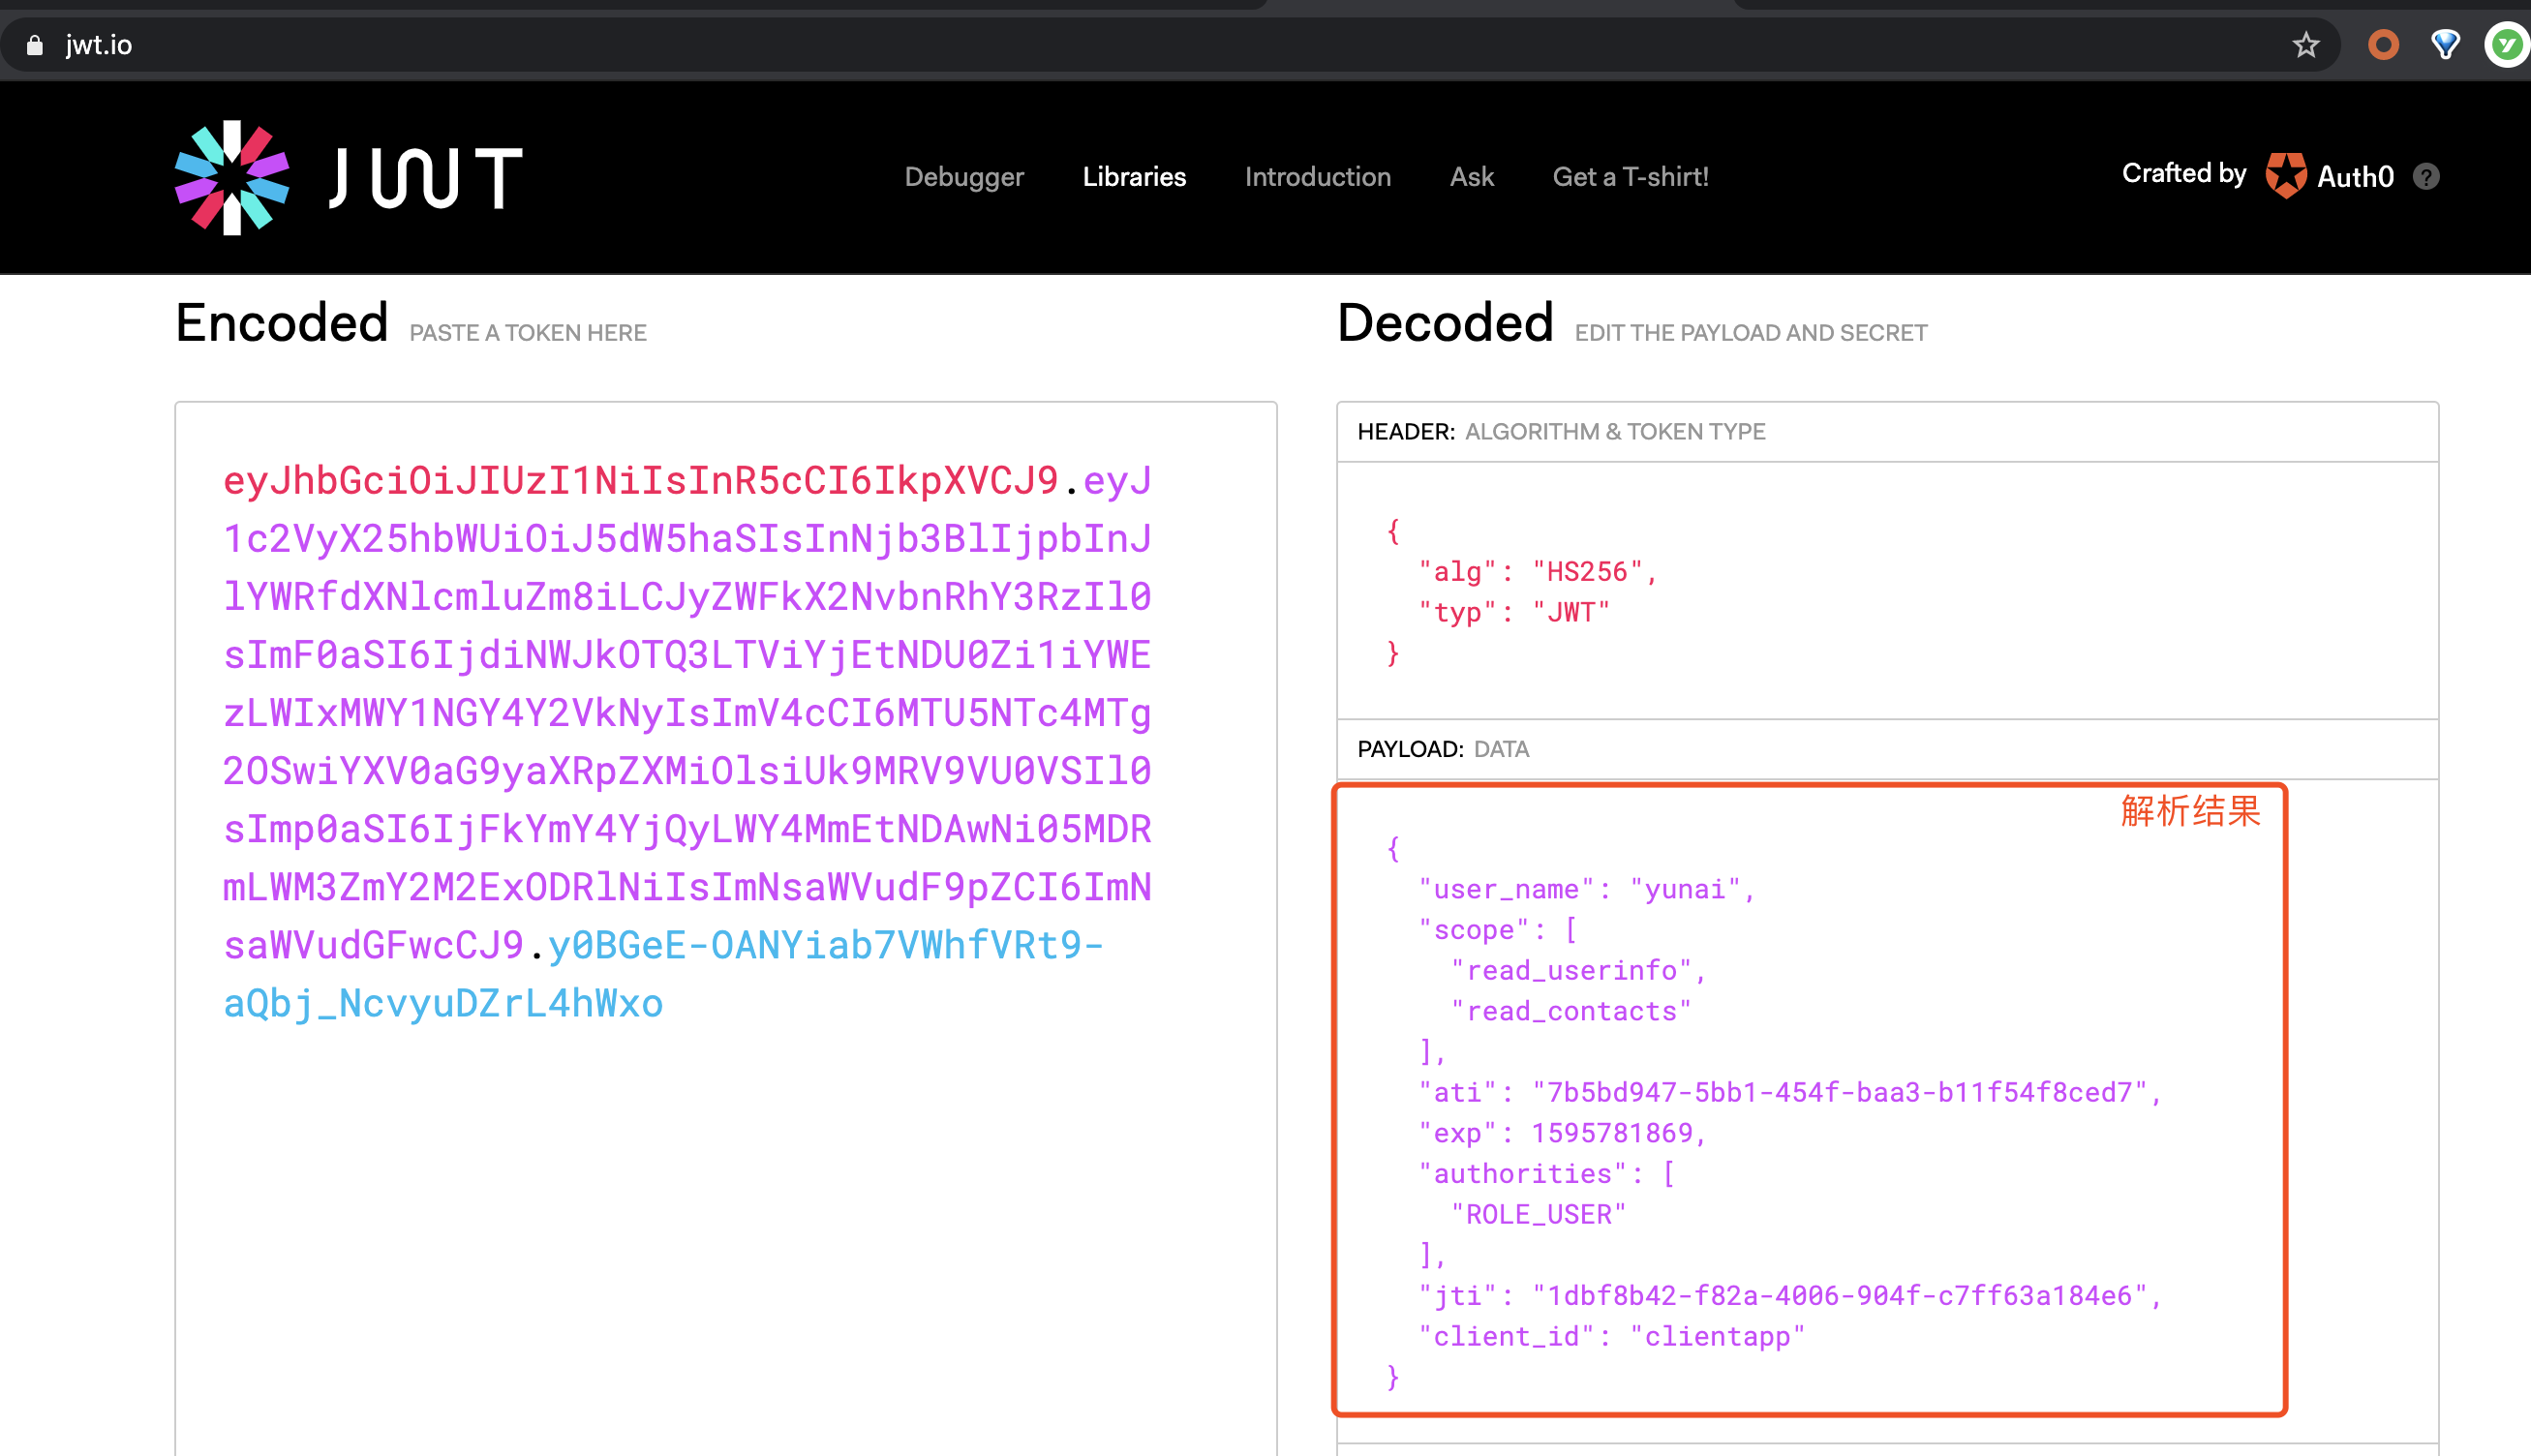
② 使用 https://jwt.io/ 提供的工具,解析 JWT 令牌。如下图所示:
666. 彩蛋
比较简单的一篇文章,下一篇《芋道 Spring Security OAuth2 单点登录》走起!
